Lagaffe
Resource contributor
- Messages
- 860
- Country
-

Hello,
To set the scene, I'm using the Blender 2.83.2 version which was recently released. In the second step, I validated a number of plugins available from ors and already in the basic version but originally inactive.
Either these plugins are necessary/complementary to the ones I searched for on the Internet or their intrinsic value is well worth the few minutes I spent validating them.
A) The list I made myself is the following:
- Node Wrangler : it's an addon that allows you to work much faster with the Shader nodes via various shortcuts. Let's say it right away, this addon requires a lot of shortcuts, but most of them are logical and are therefore simple to register. see http://blenderlounge.fr/addon-node-wrangler for more information.
- Mesh: LoopTools this addon is very useful to edit meshes easily and very quickly, it brings a great productivity when you master them
- Object: Bool Tool this addon is similiar to the Boolean modifier but it is accessible very quickly via a menu on the right and allows to go very fast
- Add curve: extra objects and Add mesh: extra objects with a little video to illustrate =>
- A.N.T. Landscape to create terrains, mountains around your scenes with one click =>
- Import-export Image as plane essential to add a transparent image (a 3-view plane for planes) in the background of the 3D Viewport in order to "transfer" your model.
- Scatter object another video illustration => https://www.youtube.com/watch?v=r5S47AtGJvE
Although the interface has been streamlined and greatly improved to get closer to the usual standards, I still find it "a bit cluttered" at least that's my opinion.
As on GMax and 3DS Max, it is possible to perform most of the internal functions in two or even three different ways.
Beware of the links I give, most of the time plugins evolve very frequently and several versions are available so please check before installing them that they correspond to your installed version of Blender (2.7x or 2.8x ...)
There are several sites where you can get plugins. Preferably I go to blenderlounge.com, gumroad.com or github portal. BlenderMarket tends to charge higher prices.
B) The first plugin I decided to install on my computer is: Theme Switcher 1.0.zip by CaptainCirno on gumroad.com/l/pstugr
It's not because I want to be a geek that I went through this plugin but because I work under a VeLux window and depending on the time of the day it can be quite annoying to distinguish the white cursor or the vertices especially in the middle of a 34" screen.
This allows me to manage the background and the color of the menus according to the lighting to adapt them to my view (I can sometimes model up to 6 or 8 hours in a row).
I have a dozen of themes among which I pick according to my needs.
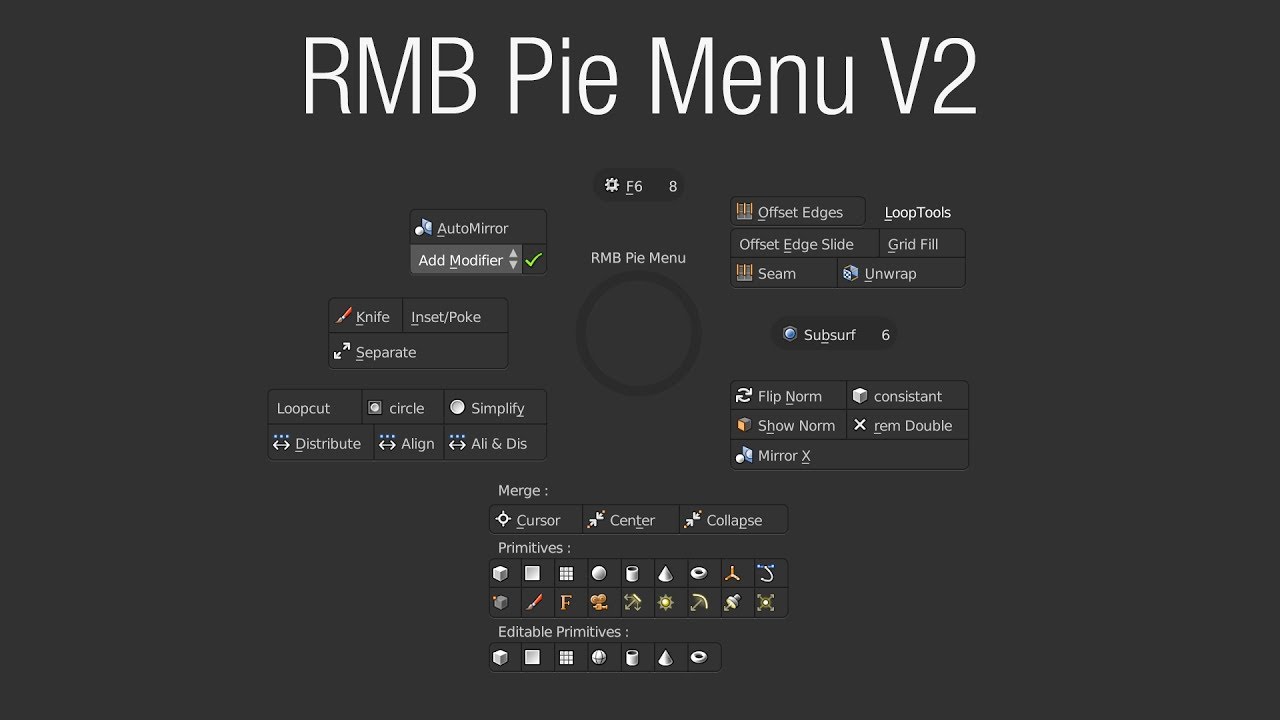
C) Still to improve the interface, I discovered a very talented French developer named C. Lepiller aka "Wazzou" (he's a contributor on BlenderLounge) who has developed a number of addons and notably a RMB Pie menu.
What's a pie menu?
This is a context menu that appears around the mouse by pressing the Z or CRTL+Z key and which, depending on the situation, displays the functions available at that moment. When you are in Vertex mode, the functions available are not the same as in Object mode or in Edit Faces, this menu provides a practical solution that is always available with a click of the mouse.
It is available at this address: Wazou RMB Pie Menu on gumroad
A picture of what it looks like on the screen:
In the same spirit C. Lepiller has developed a paying module (20 €) Speedflow_Companion 2.80 which allows to have an overlay window on the left side of the 3D Viewport, this window displays according to the situation a certain number of characteristics of the modified part, available shortcuts, etc. It's a bit like the Wazzou's pie menu but being very satisfied with its work, I wanted to participate in its efforts.
An idea of what it looks like on the screen:
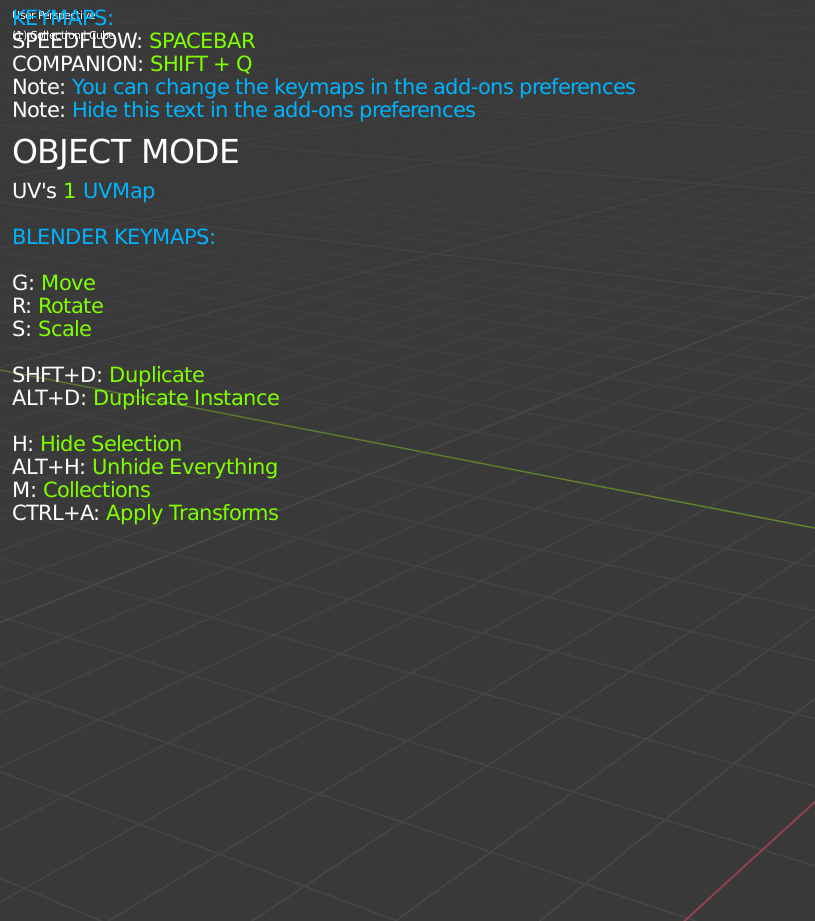
Everything is configurable: font size, colors, position on the screen in order to integrate as well as possible.
D) One thing I've never liked is to model tubes or cables. Recently I got my hands on a pluggin called TubeTool (https://blender-addons.org/tubetool-addon) that does this in no time at all and with remarkable efficiency.
An overview of the interface:

E) Finally, the textures and the mapping ... It's a step that always stuck in my mind because I couldn't master it completely. While working on 3DS, I found one day a sensational addon called Textool and I adopted it right away. At the beginning of the year, during my three months of intensive work on Blender, I found that the author of this addon had written a version adapted to Blender so I immediately installed it.
These tools are truly an indispensable Swiss Army knife for UV mapping! They allow you in no time at all to place your UV on the chosen map, to make bakes on most of the used maps (AO, AO Legacy...) and to make a baked map on a specific map,
wireframe, roughness, displacements, color ID, etc) .
A presentation of its possibilities: https://blender-addons.org/textools-addon

The doc is available in the form of short videos for each function: http://renderhjs.net/textools/blender (this is the author's site)
Do not forget to and Blender2P3DFSX to complete your installation
One last remark :
Blender is based on Python scripts, therefore I advise you not to load too much pluggins in your working version. Some pluggins can interfere with others and slow down the interface ... a real treat for this wonderful tool.
The ideal in my opinion is to use one intrinsic functions of Blender, which allows you to make several working configurations, configurations that are displayed on the splashscreen of the launcher. It will thus be enough to choose the version of Blender most adapted to treat UV mapping, another one for modeling, a third one for retopo, etc.
To set the scene, I'm using the Blender 2.83.2 version which was recently released. In the second step, I validated a number of plugins available from ors and already in the basic version but originally inactive.
Either these plugins are necessary/complementary to the ones I searched for on the Internet or their intrinsic value is well worth the few minutes I spent validating them.
A) The list I made myself is the following:
- Node Wrangler : it's an addon that allows you to work much faster with the Shader nodes via various shortcuts. Let's say it right away, this addon requires a lot of shortcuts, but most of them are logical and are therefore simple to register. see http://blenderlounge.fr/addon-node-wrangler for more information.
- Mesh: LoopTools this addon is very useful to edit meshes easily and very quickly, it brings a great productivity when you master them
- Object: Bool Tool this addon is similiar to the Boolean modifier but it is accessible very quickly via a menu on the right and allows to go very fast
- Add curve: extra objects and Add mesh: extra objects with a little video to illustrate =>
- Scatter object another video illustration => https://www.youtube.com/watch?v=r5S47AtGJvE
Although the interface has been streamlined and greatly improved to get closer to the usual standards, I still find it "a bit cluttered" at least that's my opinion.
As on GMax and 3DS Max, it is possible to perform most of the internal functions in two or even three different ways.
Beware of the links I give, most of the time plugins evolve very frequently and several versions are available so please check before installing them that they correspond to your installed version of Blender (2.7x or 2.8x ...)
There are several sites where you can get plugins. Preferably I go to blenderlounge.com, gumroad.com or github portal. BlenderMarket tends to charge higher prices.
B) The first plugin I decided to install on my computer is: Theme Switcher 1.0.zip by CaptainCirno on gumroad.com/l/pstugr
It's not because I want to be a geek that I went through this plugin but because I work under a VeLux window and depending on the time of the day it can be quite annoying to distinguish the white cursor or the vertices especially in the middle of a 34" screen.
This allows me to manage the background and the color of the menus according to the lighting to adapt them to my view (I can sometimes model up to 6 or 8 hours in a row).
I have a dozen of themes among which I pick according to my needs.
C) Still to improve the interface, I discovered a very talented French developer named C. Lepiller aka "Wazzou" (he's a contributor on BlenderLounge) who has developed a number of addons and notably a RMB Pie menu.
What's a pie menu?
This is a context menu that appears around the mouse by pressing the Z or CRTL+Z key and which, depending on the situation, displays the functions available at that moment. When you are in Vertex mode, the functions available are not the same as in Object mode or in Edit Faces, this menu provides a practical solution that is always available with a click of the mouse.
It is available at this address: Wazou RMB Pie Menu on gumroad
A picture of what it looks like on the screen:
In the same spirit C. Lepiller has developed a paying module (20 €) Speedflow_Companion 2.80 which allows to have an overlay window on the left side of the 3D Viewport, this window displays according to the situation a certain number of characteristics of the modified part, available shortcuts, etc. It's a bit like the Wazzou's pie menu but being very satisfied with its work, I wanted to participate in its efforts.
An idea of what it looks like on the screen:
Everything is configurable: font size, colors, position on the screen in order to integrate as well as possible.
D) One thing I've never liked is to model tubes or cables. Recently I got my hands on a pluggin called TubeTool (https://blender-addons.org/tubetool-addon) that does this in no time at all and with remarkable efficiency.
An overview of the interface:
E) Finally, the textures and the mapping ... It's a step that always stuck in my mind because I couldn't master it completely. While working on 3DS, I found one day a sensational addon called Textool and I adopted it right away. At the beginning of the year, during my three months of intensive work on Blender, I found that the author of this addon had written a version adapted to Blender so I immediately installed it.
These tools are truly an indispensable Swiss Army knife for UV mapping! They allow you in no time at all to place your UV on the chosen map, to make bakes on most of the used maps (AO, AO Legacy...) and to make a baked map on a specific map,
wireframe, roughness, displacements, color ID, etc) .
A presentation of its possibilities: https://blender-addons.org/textools-addon
The doc is available in the form of short videos for each function: http://renderhjs.net/textools/blender (this is the author's site)
Do not forget to and Blender2P3DFSX to complete your installation
One last remark :
Blender is based on Python scripts, therefore I advise you not to load too much pluggins in your working version. Some pluggins can interfere with others and slow down the interface ... a real treat for this wonderful tool.
The ideal in my opinion is to use one intrinsic functions of Blender, which allows you to make several working configurations, configurations that are displayed on the splashscreen of the launcher. It will thus be enough to choose the version of Blender most adapted to treat UV mapping, another one for modeling, a third one for retopo, etc.
Last edited:


