• Which the release of FS2020 we see an explosition of activity on the forun and of course we are very happy to see this. But having all questions about FS2020 in one forum becomes a bit messy. So therefore we would like to ask you all to use the following guidelines when posting your questions:

    • Tag FS2020 specific questions with the MSFS2020 tag.
    • Questions about making 3D assets can be posted in the 3D asset design forum. Either post them in the subforum of the modelling tool you use or in the general forum if they are general.
    • Questions about aircraft design can be posted in the Aircraft design forum
    • Questions about airport design can be posted in the FS2020 airport design forum. Once airport development tools have been updated for FS2020 you can post tool speciifc questions in the subforums of those tools as well of course.
    • Questions about terrain design can be posted in the FS2020 terrain design forum.
    • Questions about SimConnect can be posted in the SimConnect forum.

    Any other question that is not specific to an aspect of development or tool can be posted in the General chat forum.

    By following these guidelines we make sure that the forums remain easy to read for everybody and also that the right people can find your post to answer it.

Help with default ground textures bleeding through custom photoreal

Messages
8
Country
newzealand
Hey folks. Hope you are all well and enjoying an Easter break if that's your thing.

Long time lurker and first time poster here from New Zealand. Have been super grateful of this site as a resource, it's a gold-mine of info and experts. Great stuff.

I'm a noob when it comes to scenery editing but have been working on a few photo-real BGL sets lately for various airports in P3D v5.3 where existing ground detail is poor (e.g. Default) or where add-ons (e.g. Orbx and FCScenery variously) could do with a little more detail.

Have been using the excellent Ortho4XP v1.30 to capture tiles at zoom-level 19 for airports and any adjacent area and trimming the boundaries of edge tile in Gimp with a white background, saving to BMP again and re-running 'resample.exe' for any edited BMPs with an INF file based on the one that was spat out by Ortho4XP (which also uses scenproc/sbuilder I believe???)

The INF specifically has the NullValue colour set to 255,255,255 to match the white trimmed background.

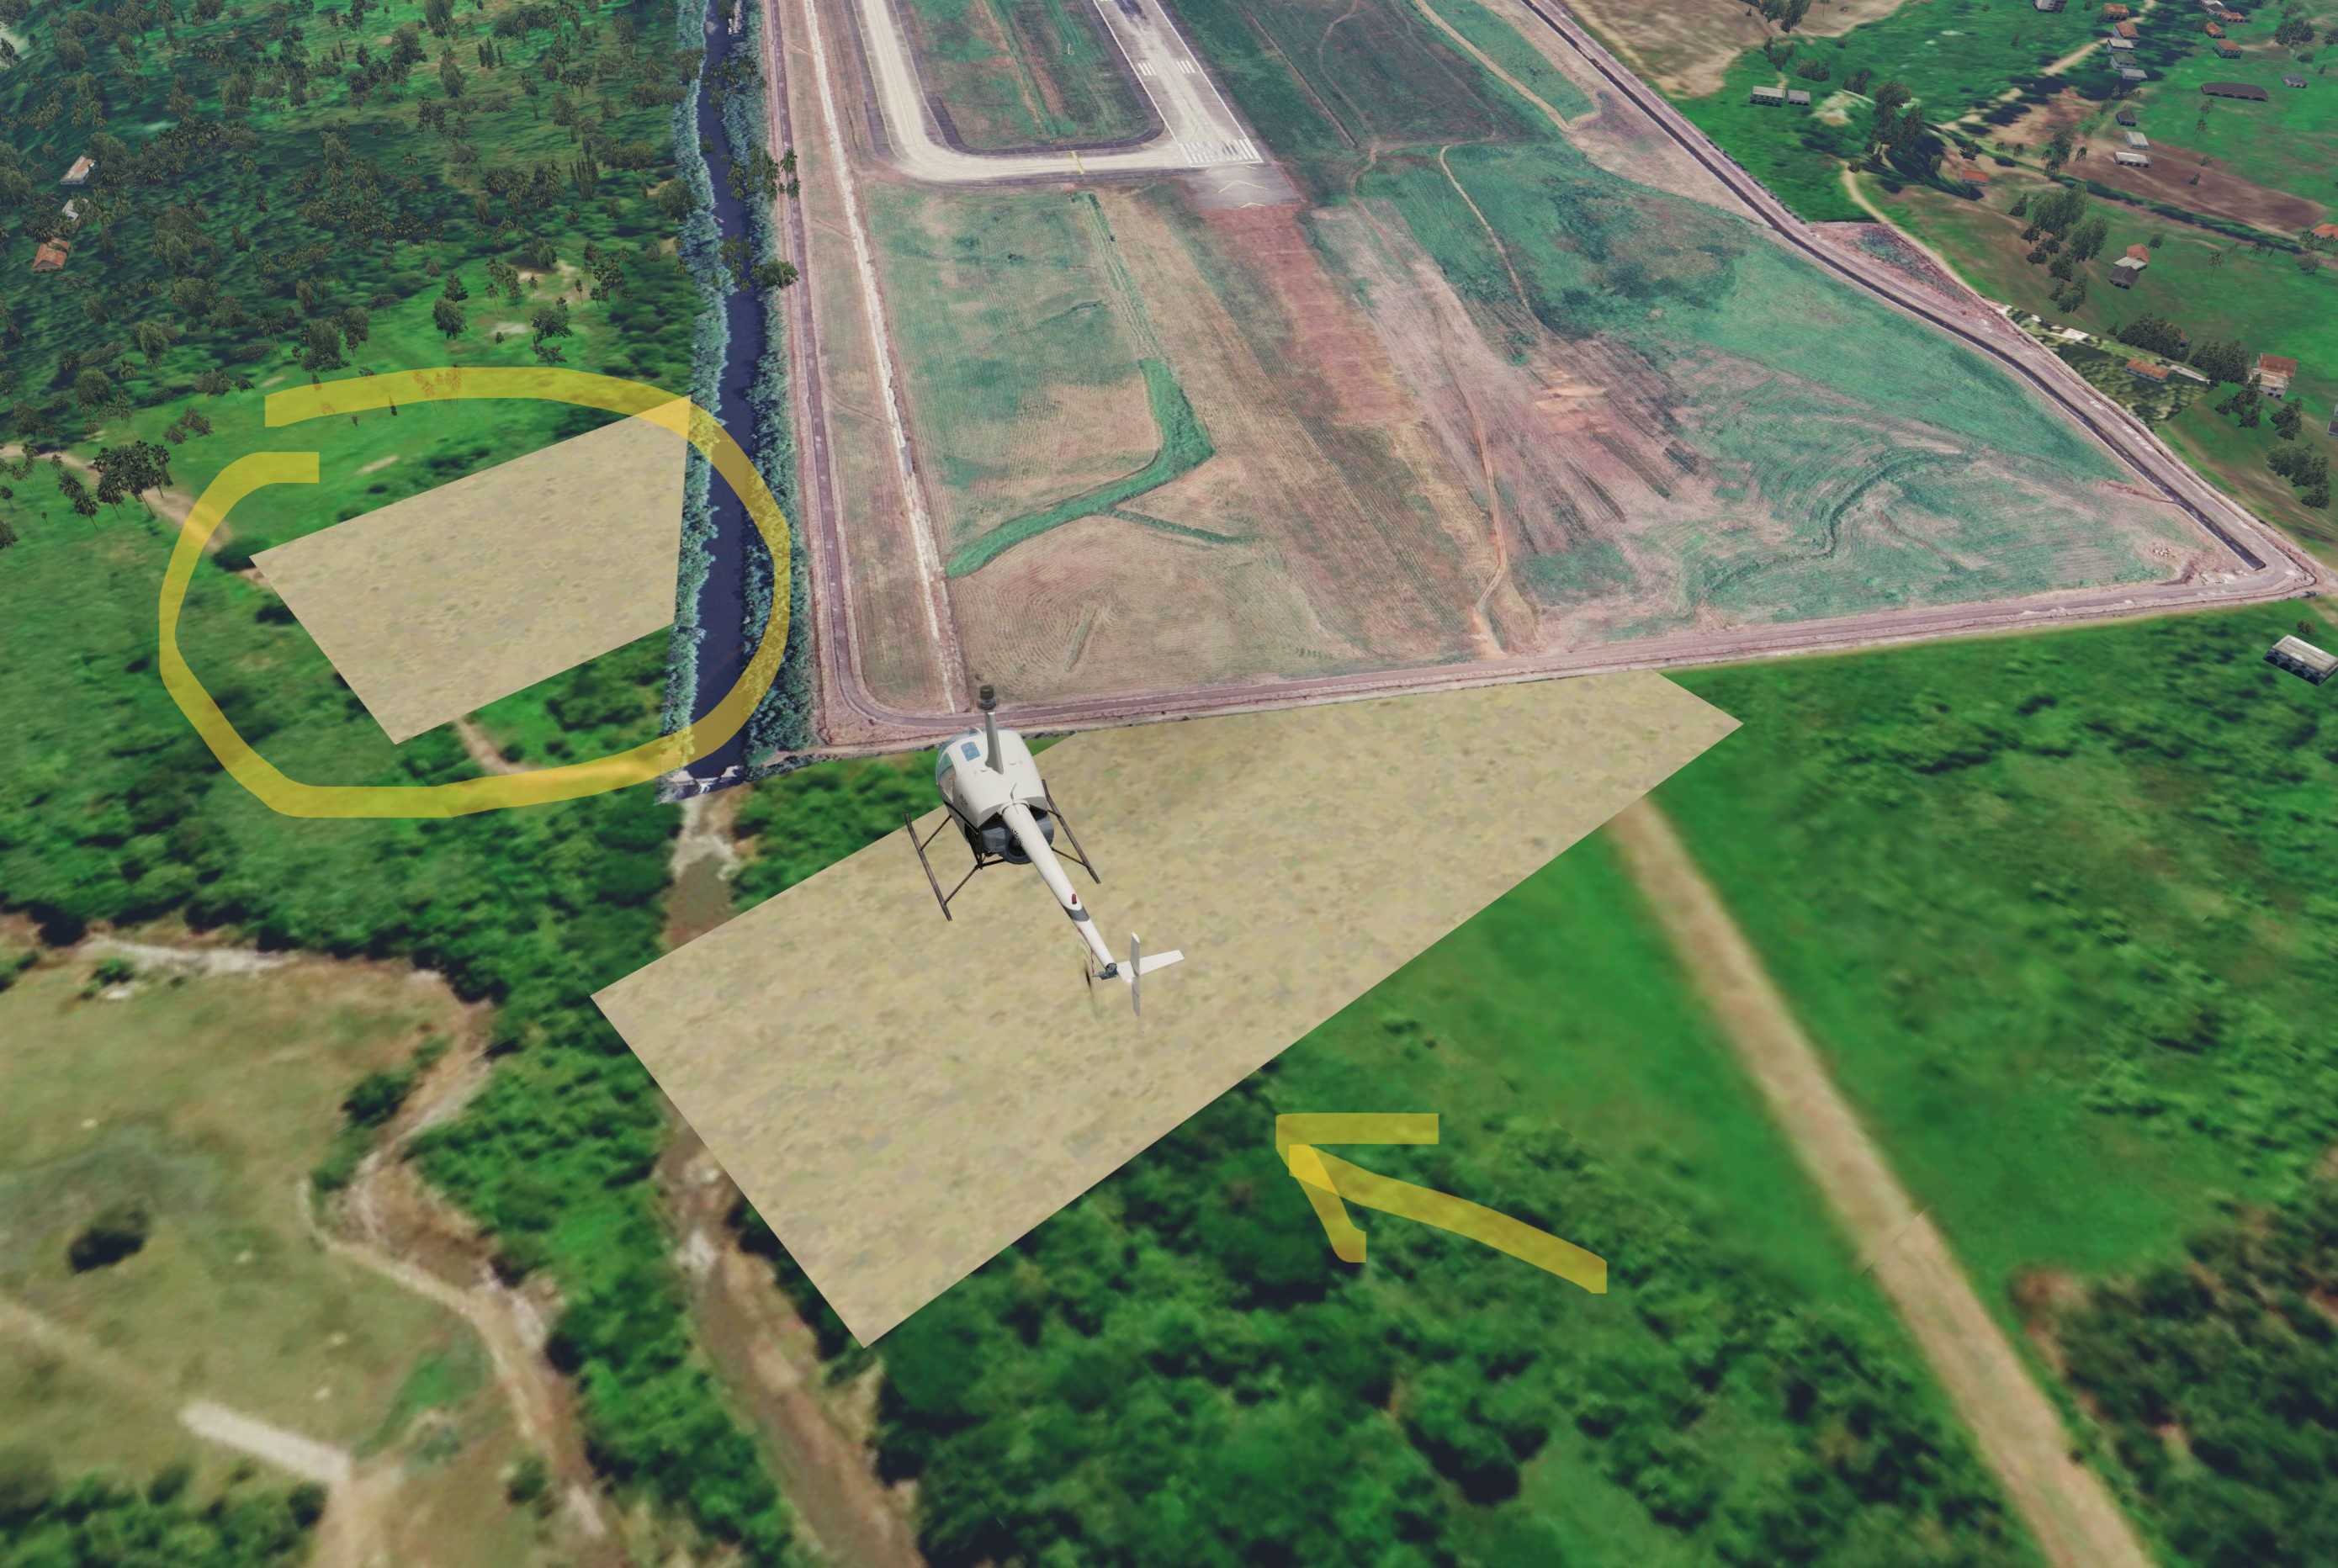
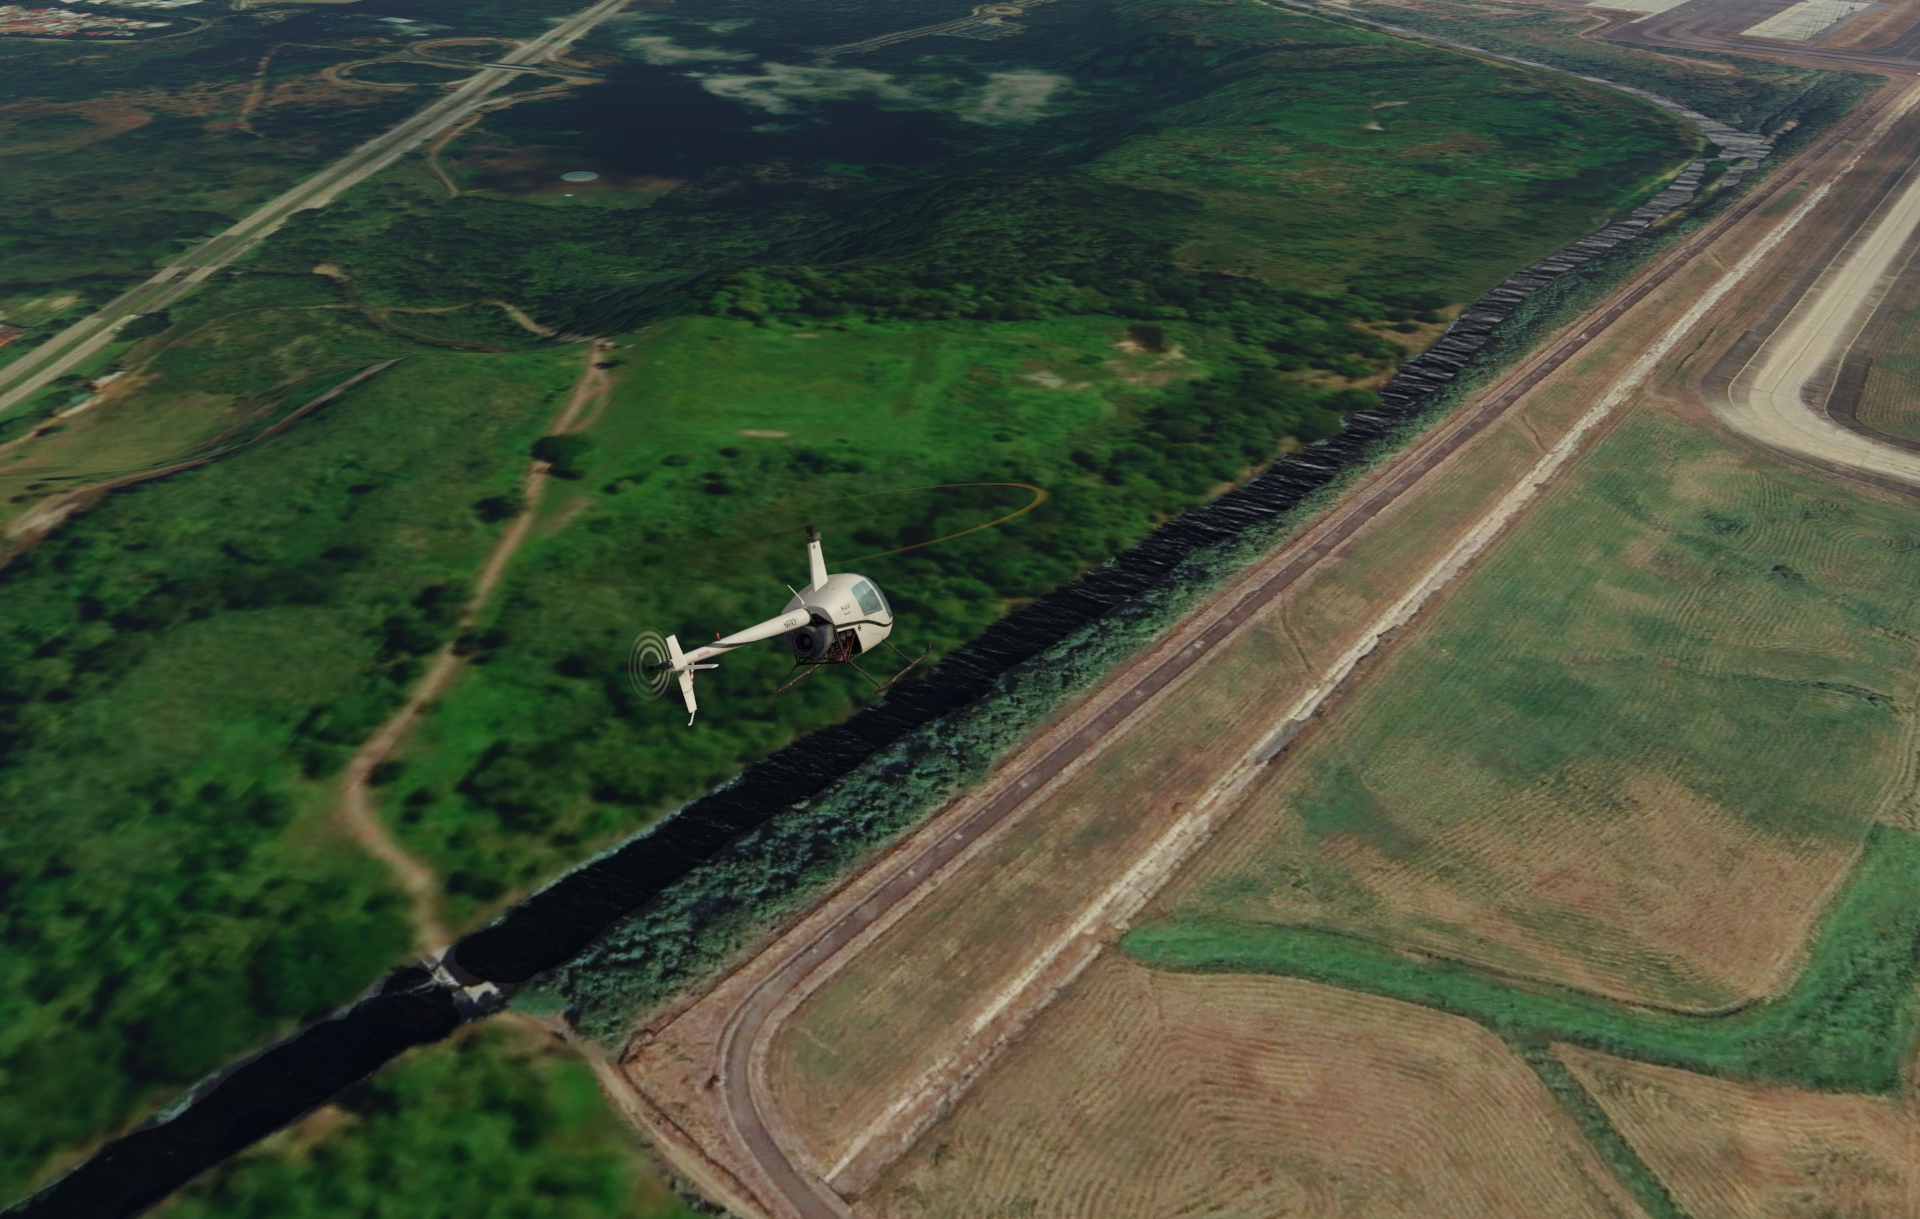
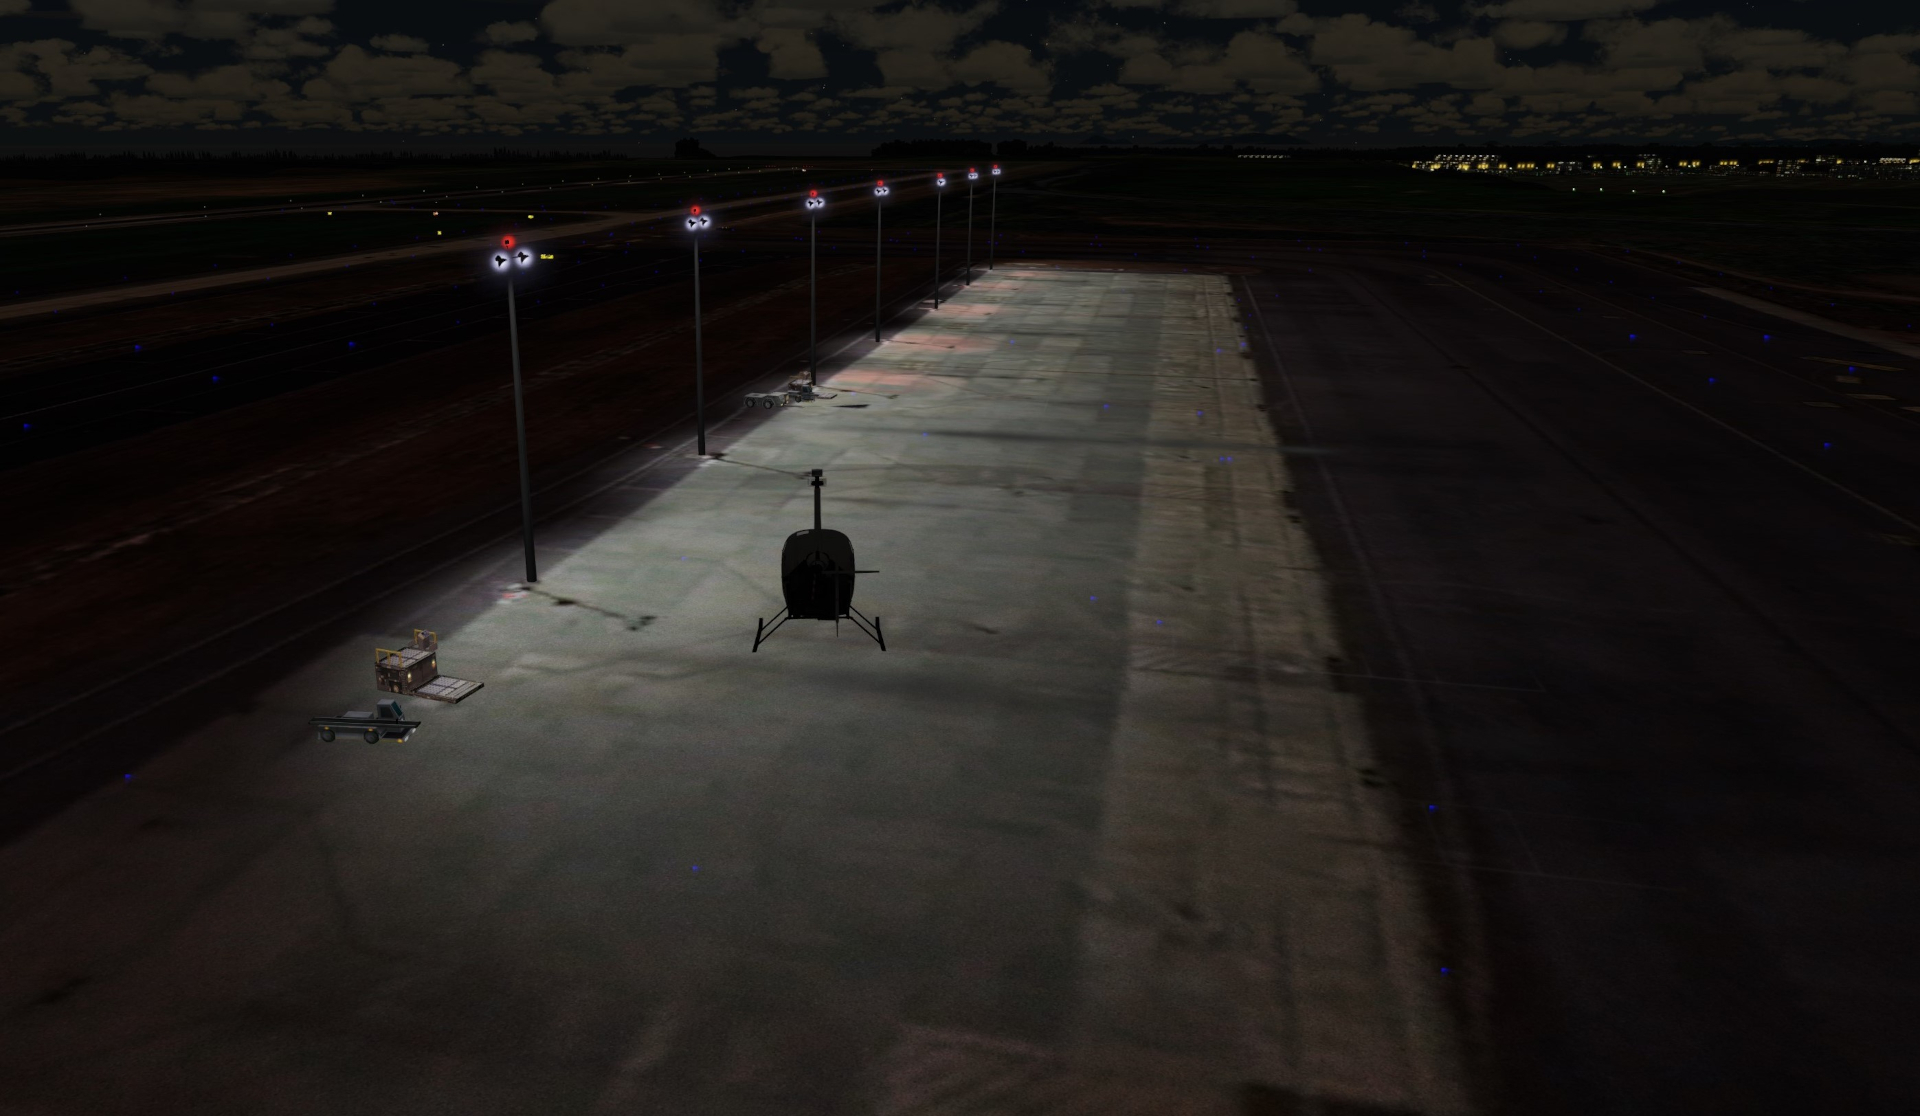
This works well, am really pleased with results. When on approach from say 1500ft or more above the airfield it all looks good, and at ground level doing a taxi in an aircraft or low level hover in a chopper it also looks great. However there's an issue I'm seeing at pretty much all of these location's I've edited where what looks like sections of default P3D ground texture are randomly bleeding through my trimmed photoreal tiles. This occurs at low levels and seems to be when directly above a tile area.

The bleed seems to come and go, and isn't the entire area of any given trimmed section, just random small rectangular sections.

Pics following. Also a sample INF file.

Could anyone please help me work out why this is occurring, is rather frustrating after all the effort of editing the BMPs. Have taken a decent look through the forum and couldn't spot anything directly related to this so sorry if has been asked before, please fire me a link if so.

In-game shots showing issue..
spot-view.jpg
top-down.jpg


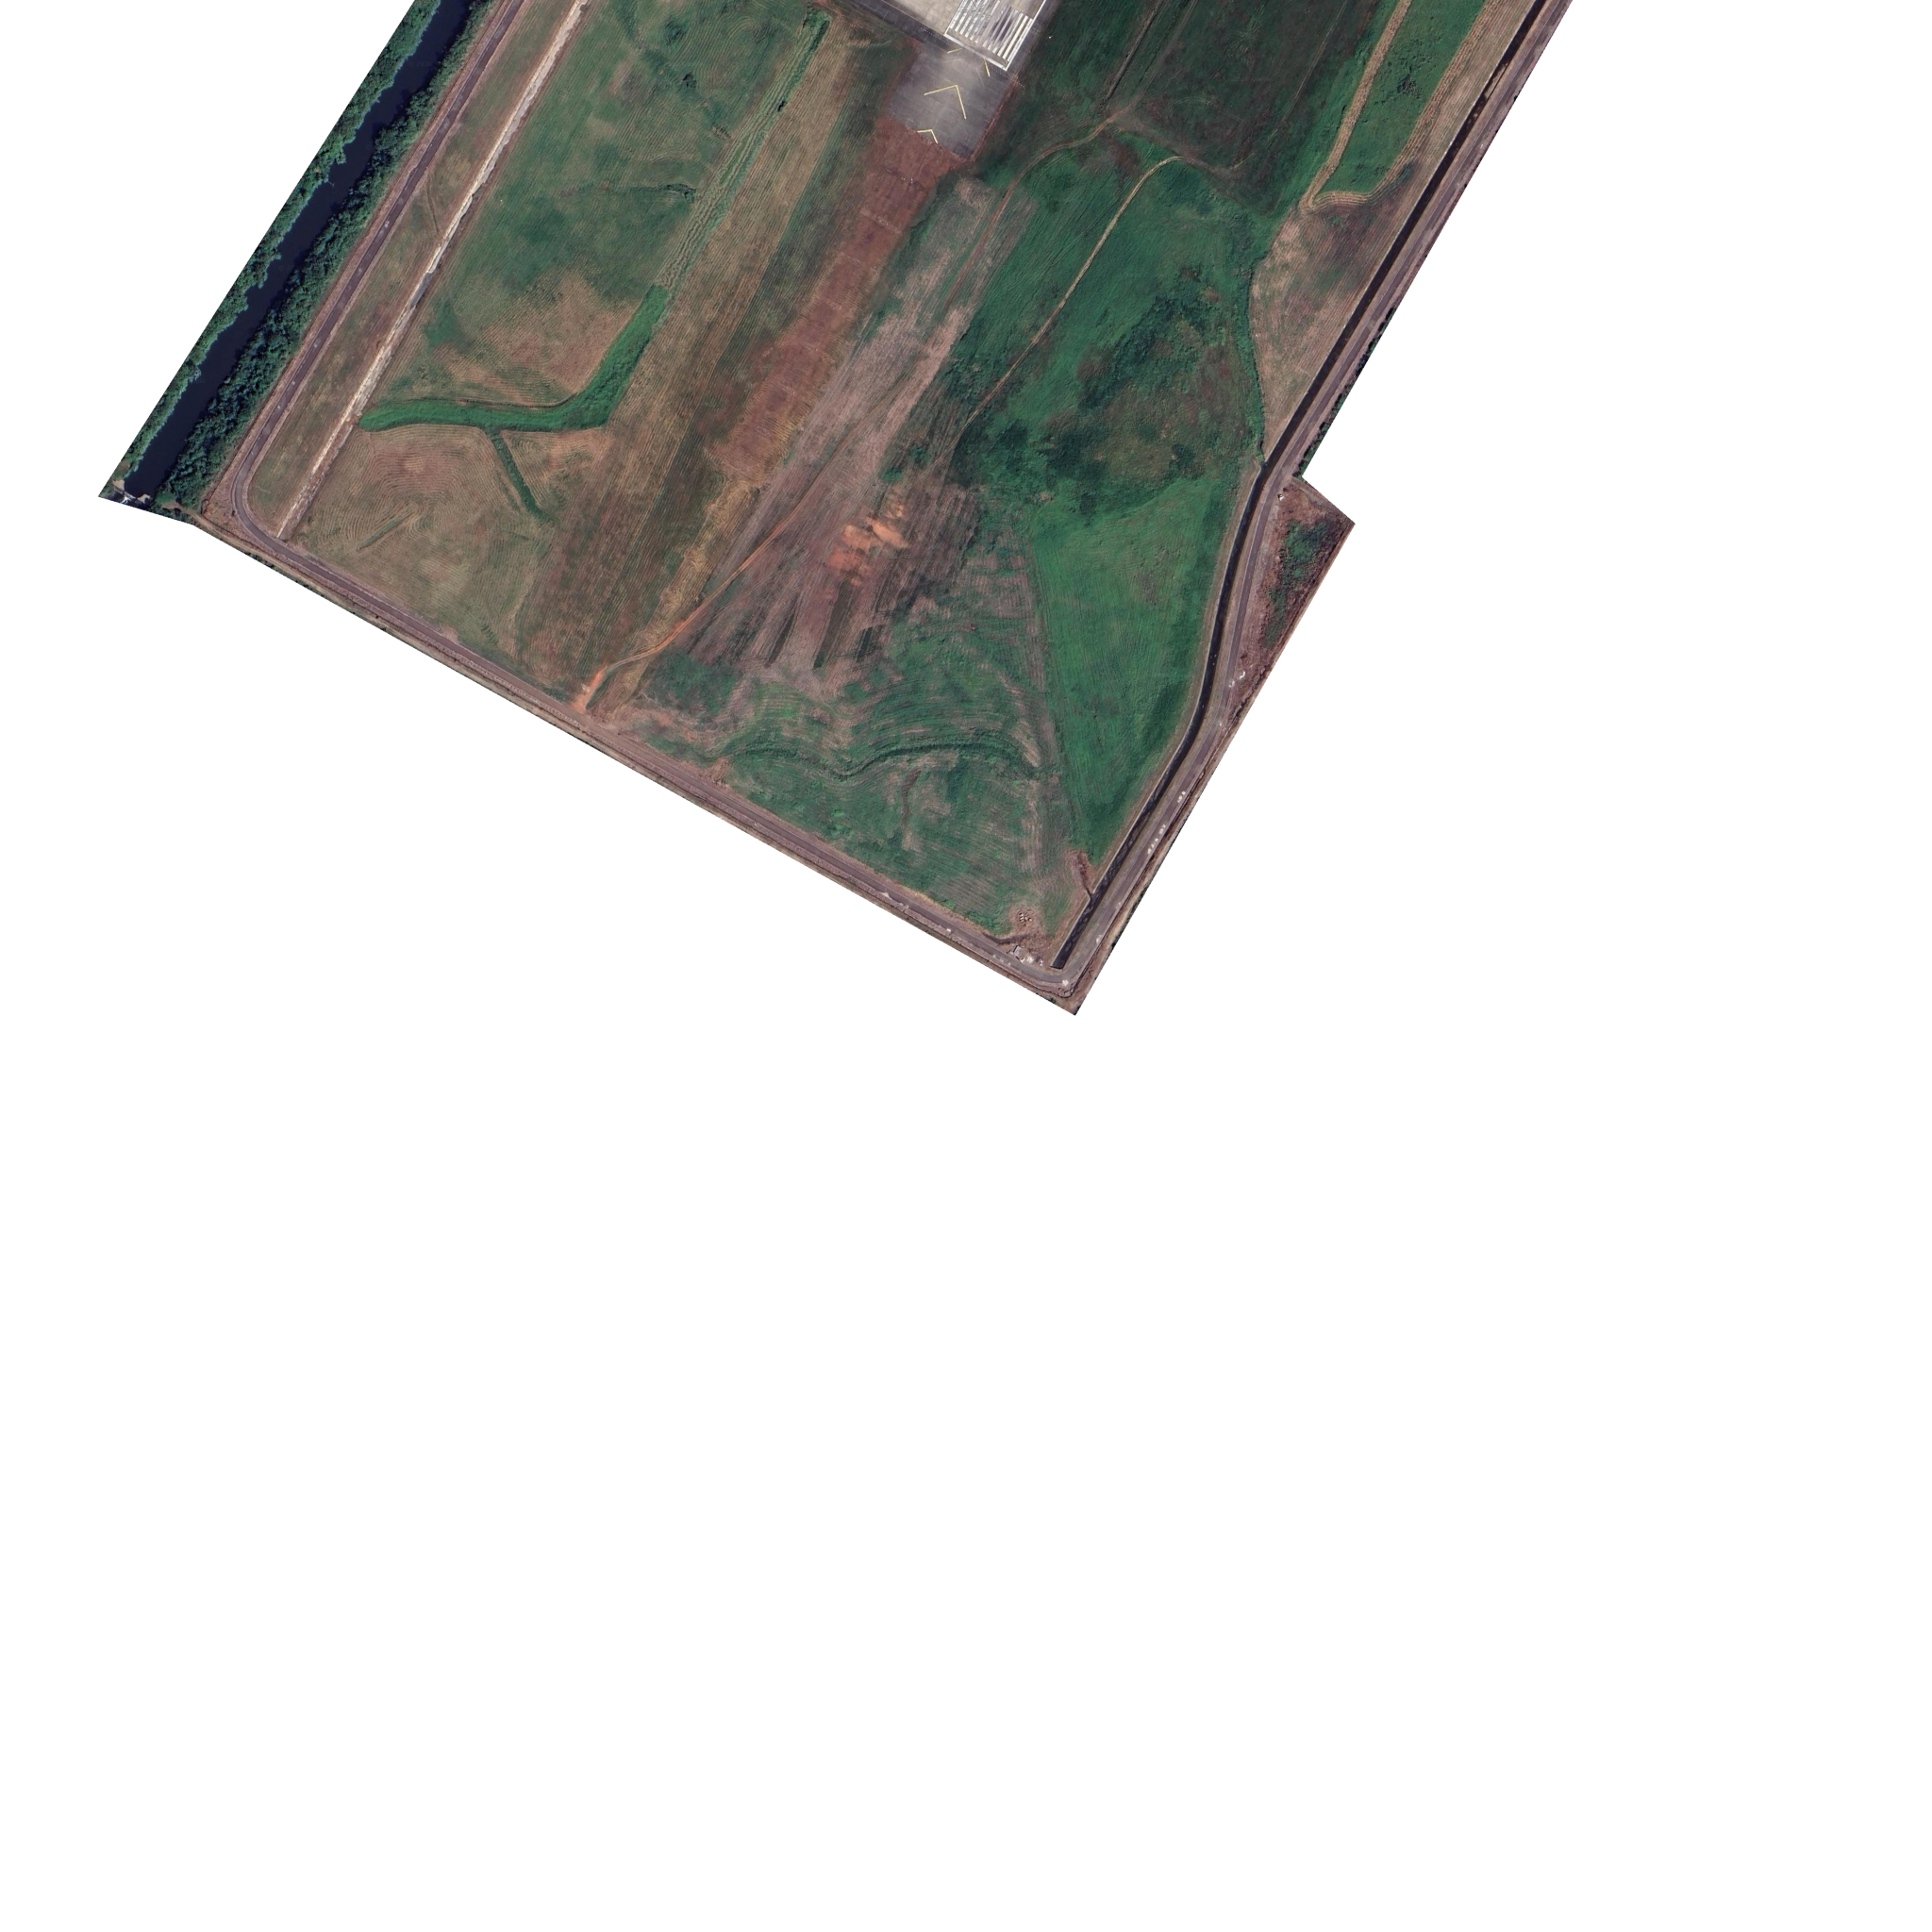
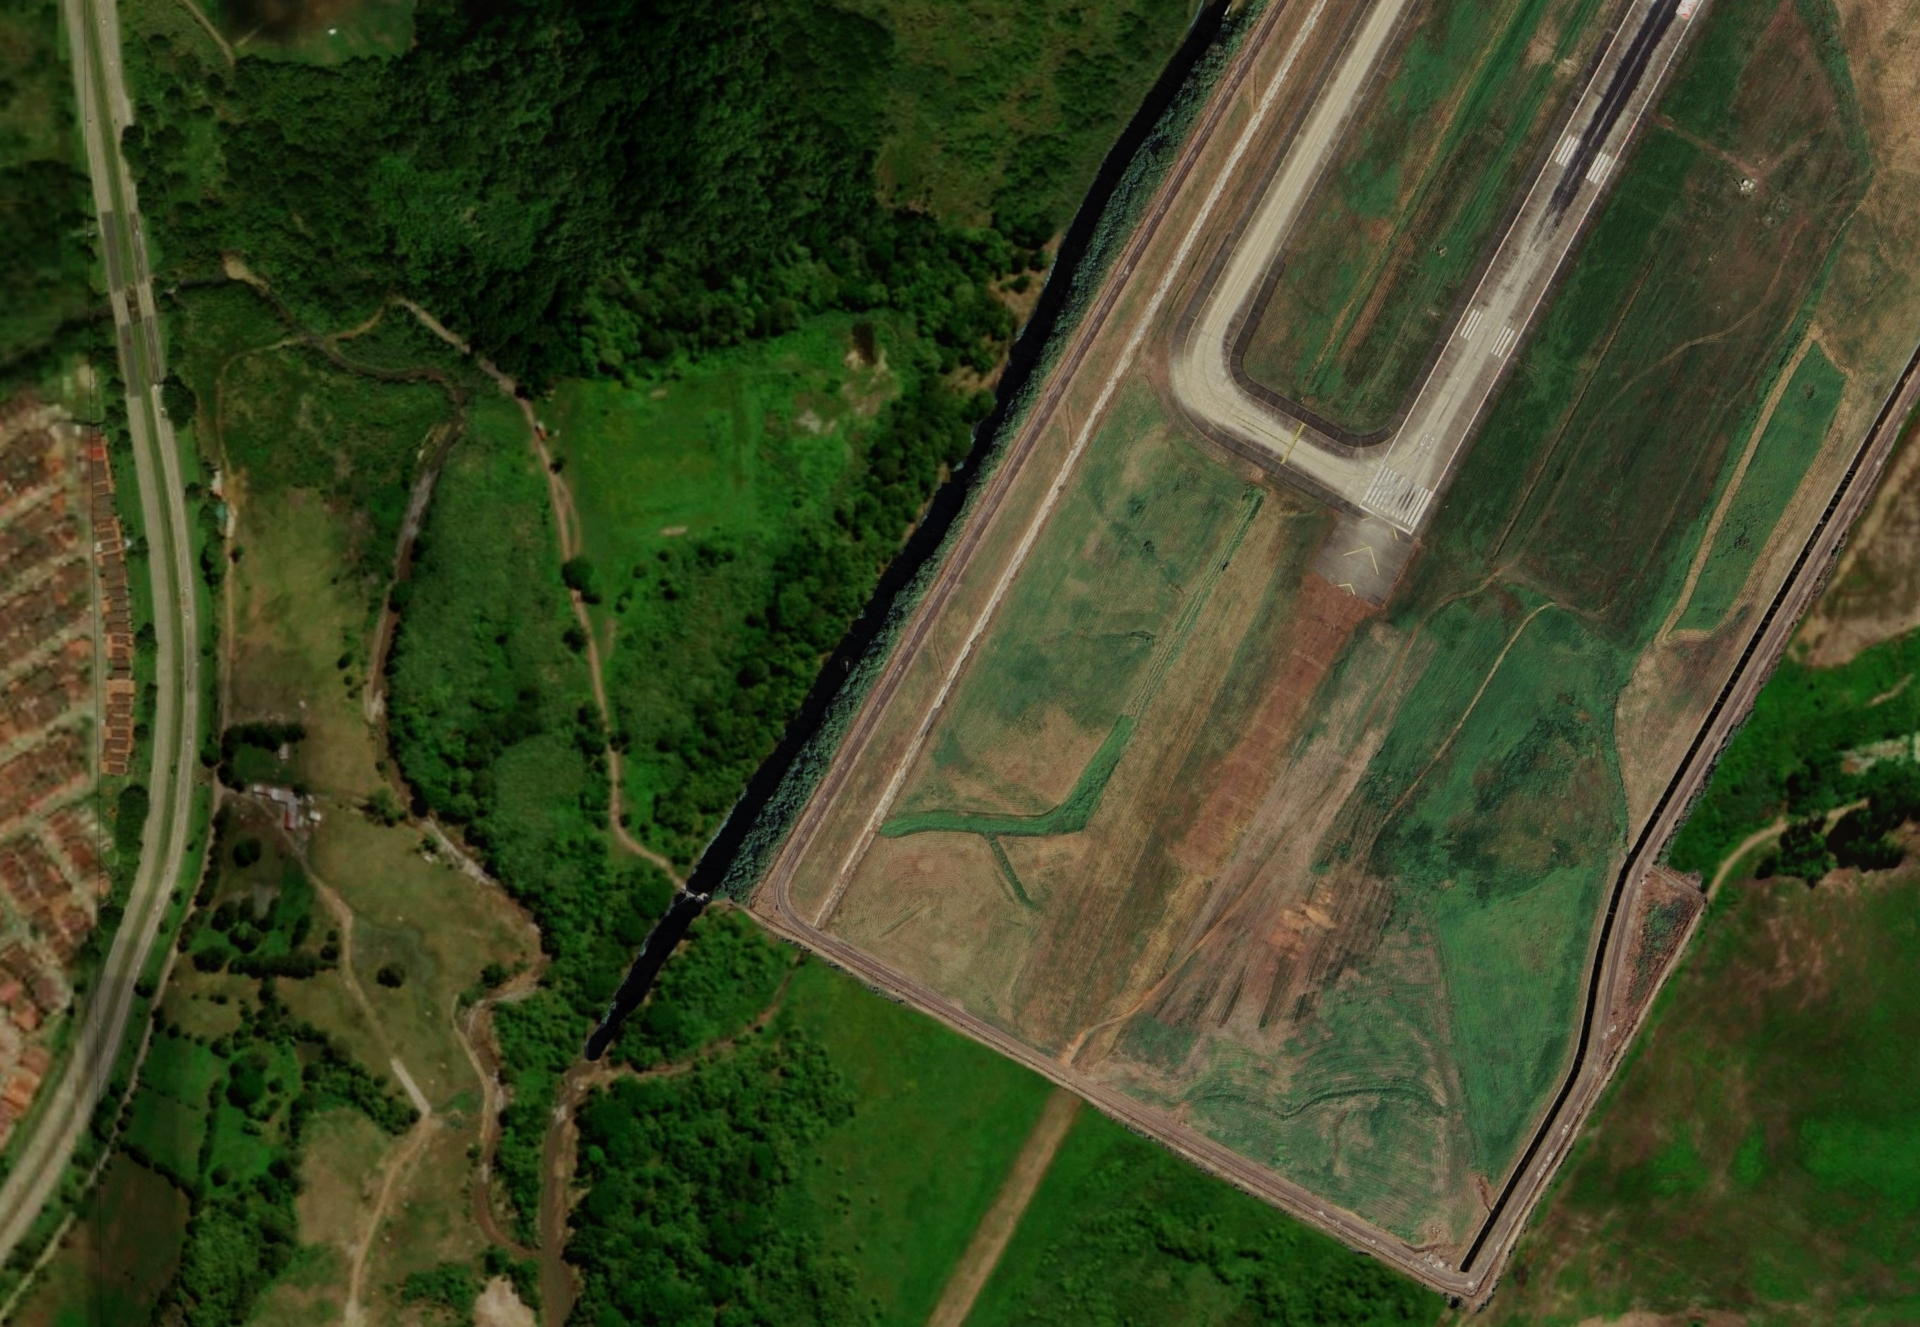
JPG export of the BMP used to generate the tile..
trimmed-source-tile.jpg


Sample INF file...

[Source]
Season = Summer
Variation = All
Type = BMP
Layer = Imagery
SourceDir = P:\Scenery Projects\MPTO\photoreal\.
SourceFile = 248912_146512_GO219.bmp
Lon = -79.398193359375
Lat = 9.047852691011144
NumOfCellsPerLine = 4096
NumOfLines = 4096
CellXdimensionDeg = 2.682209014892578e-06
CellYdimensionDeg = 2.6488751322557846e-06
PixelIsPoint = 0
SamplingMethod = Point
NullValue = 255,0 0

[Destination]
DestDir = .\ADDON_SCENERY\scenery
DestBaseFileName = 248912_146512_GO219
BuildSeasons = 0
UseSourceDimensions = 1
CompressionQuality = 100
 
Hello:

FYI: White in the Blend Mask channel allows totally unrestricted display of underlying default or 3rd party textures.

[EDITED]

Using the (1) single available extra channel (layer) of a BMP image as an Alpha channel using White, results in what your Resample image shows.


However, SDK Resample requires explicit definition of all channels (layers) from all separate images intended to be used as visible images or Masks.

So one must use a slightly more complex "Multisource" INF file structure to implement Land / Water and Blend.

The tutorials cited below, and numerous FSDEV discussion threads show example Multisource INFs for SDK Resample.


NullValue = 255,0 0


Also, the SDK Resample docs explain the proper use of NullValue parameters:

https://learn.microsoft.com/en-us/p...sdn.10)?redirectedfrom=MSDN#the-resample-tool

NullValuenumber, ?Sample value for each channel indicating that there is no data in the current pixel. For imagery sources use a comma-separated
list: red,green,blue,[,land/water[,blend]]. For all other sources use a single value.
Typically NullValue might be set to 255,255,255, as white indicating no data.


[END_EDIT]


The rectangles in your screenshot are not in FSX default scenery at Tocumen, and may be other textured land class polygons from 3rd party scenery.


Consider extending the visible area of coverage by the custom photo-real aerial imagery land class so something displays on top of 3rd party textures.


You may wish to review this Tutorial by Tiberius et al at flightsim.com (only surviving archive with original images is here):

http://web.archive.org/web/20131008...50762-How-to-create-photoreal-scenery-for-FSX

"Creating a Blendmask

Usually you don't want the entire background image to show up in FSX, only parts of it. So you need to carve out the parts you want or cover up those you don't want. You do that with a blendmask. It's similar to a watermask where everything painted in black will be water in FSX. But when doing a blendmask, everything that is painted in black won't show up at all in FSX. The good thing about that blendmask thingy is that it does not have to be in either black or white, it can have grey scales which means you can soften the edges of your image and let it blend in with the default FSX scenery or ocean water background."


To learn procedures for making more accurate scenery in local FS world areas, you may wish to review this tutorial:
:teacher:


Terrain Design

sendfile.php

File Description:
Terrain Design for Flight Simulator X

This simple illustrated document explains the basic concepts in Flight Simulator X terrain, and how to change them using SBuilder for FS X. Make new water bodies, roads, vehicle traffic, airport flattens, remove autogen, add more detail - anybody can do it easily and quickly.
My most sincere apologies - I am unable, for lack of free time, to offer support of any kind. For questions or problems, please post in the Avsim scenery design forum.

Filename: terrain_design_for_flight_simulator_x.zip
License: Freeware
Added: 14th December 2009, 13:29:15
Downloads: 16648
Author: Luis Feliz-Tirado
Size: 3991kb

https://library.avsim.net/esearch.php?CatID=fsxsd&DLID=141643


To make more accurate FS scenery, you are likely to also encounter these topics at some point as well:

Make photo-real ground textures

sendfile.php

File Description:
It is very easy to create your very own high-resolution, custom (photo-real) ground textures. This document explains the concepts and techniques and illustrates the use of SBuilderX with which you can quickly and easily download aerial images and make this type of scenery. So, why hesitate? Make Flight Simulator scenery as real as it gets! Very sorry - no support of any kind is offered. Please do not write. For any questions, please post in the Avsim Scenery Design Forum.

Filename: make_photo-real_ground_textures_in_fs_x.zip
License: Freeware
Added: 21st November 2009, 23:20:06
Downloads: 17714
Author: Luis Feliz-Tirado
Size: 2143kb


How to create photoreal scenery for FSX
https://library.avsim.net/esearch.php?CatID=fsxsd&DLID=140539


Using the Autogen Annotator

sendfile.php

File Description:
The Autogen Annotator is a powerful tool for modifying the autogen of default ground textures or adding autogen to custom (photo-real) ground. This document illustrates the use of the tool, and includes a pictorial guide to all autogen object types. Very sorry - no support of any kind is offered. Please do not write. For any questions, please post in the Avsim Scenery Design Forum.

Filename: using_the_autogen_annotator_264833.zip
License: Freeware
Added: 21st November 2009, 16:18:51
Downloads: 4220
Author: Luis Feliz-Tirado
Size: 8930kb

https://library.avsim.net/esearch.php?CatID=fsxsd&DLID=140537


You may wish to instead use imagery downloaded via SBuilderX or SASPlanet.

GaryGB
 
Last edited:
Fantastic Gary !!! will have a good read of those resources, thanks so much for the response. Will post my results later 👍
 
@GaryGB you are a legend mate !!! .. thanks for those resources.

Spent a lot of time over the weekend working through those and playing in the various tools I have and am happy to report I now have layer masks for both ground and water layers for each base tile so those pesky bleeding areas are GONE !!! ... and ... I now have water showing through in the right places. I also FINALLY now know how to create night textures so am busy adding those along with some hand painted highlights (still working on that)

Thanks again for your help :)👍

stg2-watermask.jpg


stg2-topdown.jpg


stg2-night.jpg
 
Last edited:
Your screenies look great. ;)

Glad I was able to help; it is good to see that the time I spend scanning these (and other) FS forums can prove useful to others when info is shared. :)

GaryGB
 
Back
Top