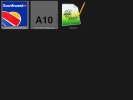
To do this, the way I did it for the airline logos/stand numbers, I have both materials calling for "xxx_jetway_stands" and "xxx_jetway_logo"
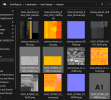
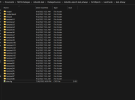
I export the jetway as usual, and then create my "livery" folders, ie, the texture.xx folders, those textures must be named the same as what the material is calling for. Each of my folders has the according stand number and airline logo png in it, typically those are all small texture sizes, with the fallback texture.cfg in each one.
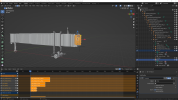
I don't add a specific model folder/fallback for each jetway, it works without it. I do have a couple variants of the jetways, which are separate models, and added accordingly.
Here's a few screenshots, again, this needs to be done in the package sources, then built. The titles of the Fltsim entries you enter equate to the name of the container when selecting for placement, which i'm sure you're aware of! Those textures as well, to save on size and what not, just drag in the albedo's for each according, leave comp/normals to draw from default, if any. My stand numbers are each typed out on a 512x256, alpha'd, and set as a decal material over the sign enclosure.
Hope this helps.
sim.cfg snippet:
[VERSION]
Major=1
Minor=0
[fltsim.0]
title=ksat-jetway_A15
model=
texture=A15
[fltsim.1]
title=ksat-jetway_A17
model=
texture=A17
[fltsim.2]
title=ksat-jetway_B2
model=
texture=B2
[fltsim.3]
title=ksat-jetway_B3
model=
texture=B3
[fltsim.4]
title=ksat-jetway_B4
model=
texture=B4
Screenshots: