• Which the release of FS2020 we see an explosition of activity on the forun and of course we are very happy to see this. But having all questions about FS2020 in one forum becomes a bit messy. So therefore we would like to ask you all to use the following guidelines when posting your questions:

    • Tag FS2020 specific questions with the MSFS2020 tag.
    • Questions about making 3D assets can be posted in the 3D asset design forum. Either post them in the subforum of the modelling tool you use or in the general forum if they are general.
    • Questions about aircraft design can be posted in the Aircraft design forum
    • Questions about airport design can be posted in the FS2020 airport design forum. Once airport development tools have been updated for FS2020 you can post tool speciifc questions in the subforums of those tools as well of course.
    • Questions about terrain design can be posted in the FS2020 terrain design forum.
    • Questions about SimConnect can be posted in the SimConnect forum.

    Any other question that is not specific to an aspect of development or tool can be posted in the General chat forum.

    By following these guidelines we make sure that the forums remain easy to read for everybody and also that the right people can find your post to answer it.

MSFS20 Problem compiling models in FS 2020 after MSFS Exporter

Messages
204
Country
us-texas
I was able to export 3 simple cubes, but I'm really banging my head here as I'm not able to get any even slightly more complex buildings working like hangars. I tried two different hangars, which both worked in Xplane. I set the entire hangar to just one texture (non-PBR) just an albedo. The compiler is not generating the DDS or final BGL files and seems to be failing on some geometry checks, but maybe it's textures or combination. Blender version is 2.83.6, MSFS exporter version is 0.40. Tried exporting with both "apply geometry on and off" in the MSFS exporter settings. Yes, I have the hangar selected in edit Mode (select all).

Tried recalc'n normals inside + outside + rotation and scale.

Here is the error:
-- GLTFLister failed to load model... Failed to spawn the GTLFLister.... Failed to spawn lister for asset group --


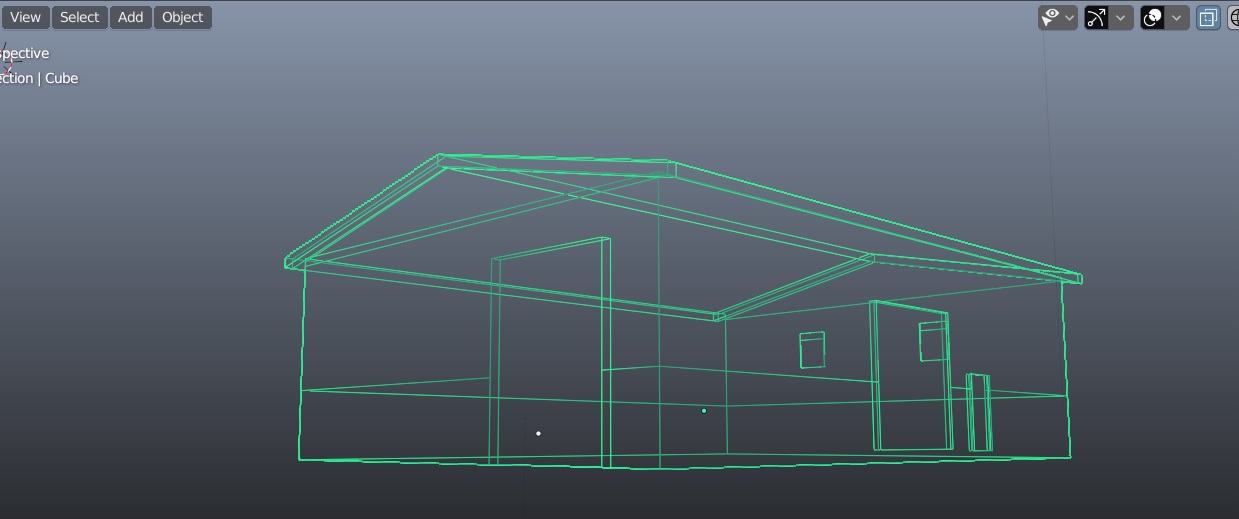
Here is the model, I don't really see any geometrical issues, but maybe I am missing something...
 
Last edited:
Hi,
During my first tests I had similar problems, my textures were not well placed and the export could not find them. Once the location was found it worked perfectly.
As I could see on the console screen: one task was completed and another failed.

I took the habit to manually delete the directories _PackageInt and Package generated by the compiler between two build operations to be sure that it works correctly sometimes I got the compiler wrong.
I have also make a copy of fspackagetool.exe in the root directory of my project and launch the build by a drag and drop of my project's XML file on fspackagetool.exe: it seems to me to be slightly faster.

I am also Moderator on http://pilote-virtuel.com and I have create a little example for french people who are on this forum: http://frenchvfr.free.fr/download.php?lng=fr&pg=769&tconfig=0 If you can find some interest ?
 
Hi:

Thanks for the info, the directories and textures are setup like the DNAK Akure example from that guy that posted the How To. I always start with a fresh directory, I have attempted this 8-10 times now with no success, but yes it could likely be something very simple that I am missing (user error is possible). If I replace the project with a cube and use exact same textures and folder files and names (identical), then it works.

Maybe it's something to do with Blender or the way I do modeling, but maybe it is my file structure as you noted. However, it's hard to think how it's file structure when I tried to so many times and it always works on a simple cube with same file structure. I'll experiment more, but maybe I should try uninstalling / reinstalling Blender and the exporter tool as well, kind of running out of ideas.

Thanks for the link to your forum, I'll check it out. I will have to use Google Translate, looks pretty cool though.

I'll update this thread tomorrow or the day after, after several more attempts I'll try.
 
Yah tried that method, and tried it in edit mode too. Also tried with Exporter as checked to Selected Object and without check.

Like i could probably write about 2 pages of what I've tried, but I'll keep trying :)
 
Make sure you directory structure looks like this in the package.

 
Edit

May have spoken a bit too soon, still having issues whenever I try to export an object that has more than one albedo texture file.
 
Last edited:
Always one modification and only one before a test ;)
Happy to see it was solved.
 
The issue went away and then came back, so I went into further diagnostics and found out the gltf file becomes invalid with certain vector configurations to do with third-party addons and mapping nodes. Even without third-party addons, adding a vector mapping node manually to the albedo appears to also cause it.

So my issue had nothing to do with textures, folders, missing files, or builds; instead it was completely and totally related to the nodes.

So I got my textures scaled in the UV, so just experimenting with it. Appears to work, but haven't tried multiple textures yet again, but I assume next try will work since i got rid of that vector issue.
 
Last edited:
The issue went away and then came back, so I went into further diagnostics and found out the gltf file becomes invalid with certain vector configurations to do with third-party addons and mapping nodes. Even without third-party addons, adding a vector mapping node manually to the albedo appears to also cause it.

So my issue had nothing to do with textures, folders, missing files, or builds; instead it was completely and totally related to the nodes.

So I got my textures scaled in the UV, so just experimenting with it. Appears to work, but haven't tried multiple textures yet again, but I assume next try will work since i got rid of that vector issue.
What do you mean "multiple albedo textures? Are you adding textures via nodes or better yet, are you messing with the nodes at all because I believe that's a no-no currently. May want to verify with Vitus but I believe tinkering with textures in the node system will cause problems. Only mess with the MSFS material settings and add/remove textures through that interface.
 
What do you mean "multiple albedo textures? Are you adding textures via nodes or better yet, are you messing with the nodes at all because I believe that's a no-no currently. May want to verify with Vitus but I believe tinkering with textures in the node system will cause problems. Only mess with the MSFS material settings and add/remove textures through that interface.

I had some addons related to texture scaling and UV mapping, and I had the two addons setup concurrently in a way that caused it to interfere with the MSFS Exporter's node configuration. Hard to explain, but I was trying to optimize the method of packing the textures, but you get the general idea.

I'm still not absolutely sure the best way to handle the texturing, I guess create a single custom homegrown UV Map with the albedo and separate ones for the other PBR textures?

Right now, I'm just using a single 2048x2048 image I self-packed in Photoshop with NON-PBR textures.
 
Last edited:
I'm not entirely sure what you mean by "vector configuration" that are done by 3rd party addons? And what's a vector-mapping node? If you are using addons that manipulate the material in any way, they will necessarily be incompatible with the B2MSFS toolkit. The core of my addon is the generation of a MSFS compatible material shader node tree. If you use any software that is changing the material my toolkit is setting up, it'll screw up your export.
Maybe just tell us what it is that you want to do and we can come up with a workflow that works for you?
 
Thanks Vitus. Right it was my fault, I didn't realize the addons were altering the nodes. I come from very old version of Blender prior to this and was used to single UV map with only diffuse/albedo. The mapping node from Blender (Vector > Mapping), the texture scaler thing (it's an alternative scaling method instead of changing the UV island sizes).

So basically, what is the best workflow to pack the images with PBR's efficiently so that I don't have to break my objects up?

Edit
Haven't messed with the PBR stuff yet, so if this question doesn't make sense, my apologies.
 
Last edited:
Yeah, since Blender 2.8 a lot of things changed - for the better, if you ask me :cool:
Apologies, but I'm still not quite sure what you mean. Are you looking for a way to UV map multiple objects on one map? To get something like this?

1601541595138.png
 
Thanks, possibly eventually, but for now I want to do something simpler. Yah, new version of Blender is better, just getting used to it...
I probably just need to experiment some more at this point, as I was stuck on that issue for a while.

So if I add the other non-albedo types inside MSFS Exporter, the exporter will automatically map those over the same UV?

Hence, all albedo images custom packed on a single 2048-4096 PNG, and then adding normal, detail, emissive as individual images will automatically work?

So the Albedos are packed onto one image, but the other PBR materials are separate individual images?

The reason I got confused was I read someone's post earlier where he said he was having to export objects individually to ensure each one had a different single material.
 
Last edited:
The reason I got confused was I read someone's post earlier where he said he was having to export objects individually
When I want to create a librairy of objects, I compose my scene with all my objects and export one by one.

Nevertheless, Blender 2.8x has a lot of tools for manipulate UV Map, you can also use TextTools an addon/plugin which can help you. I have write a post on all plugins I use on Blender: https://www.fsdeveloper.com/forum/t...ins-to-add-productivity-and-efficiency.448273
You can find in this list some tools interesting for you !
 
Generally speaking, a usual workflow is something like this:
- you create your 3d models, place seam along the edges of those objects for the uv unwrapping process
- Develop a rough idea which objects in your scene should share which material/texture maps
- Select all the objects that share one material, switch to edit mode (tab), select all faces (a) and unwrap the objects (u->unwrap)
- Switch to the UV view and you'll notice that this will create the UV maps for all selected objects. Usually you need to clean up the islands a bit to make better use of the space
- Back in object mode, select one of the objects and set up your material. Change the MSFS material mode to MSFS Standard (or whatever you need) and set the parameters
- Apply the material to all the objects you put on the uv.

It now depends on your texturing process. If you're doing the GIMP/Pain.Net/Photoshop thing, you need to export the UV map and then in your texturing program create the texture maps for your material. If you use Substance Painter or something similar, you'd export all objects to an FBX file, import it, paint it and export the MSFS compatible texture set.

- Back in Blender, select one of the objects and fill up the texture slots. For MSFS standard material make sure that you have at least the Albedo and Metallic texture set.

There's some more about this here:

Note that the workflow for scenery is a bit different when you're using trim sheets for some of the objects. That's not something I use for aircraft development, so I can't really help out with that.
Great piece of info! So you mean the export will get screwed if a MSFS standard material is assigned to an object, but the field for albedo comp and norm arent filled?
 
Back
Top